


Introduction to the 6851 phones
Here's a short guide to help you familiarize yourself with one of the new phones provided by UBIK, the Cisco 6851. If you use phones from another brand (UBIK is compatible with most SIP phones), please refer to the manufacturer's user guide.
For Cisco 8800 series models, refer to this guide.
If you are using older Cisco SPA500 series models, refer to this guide.
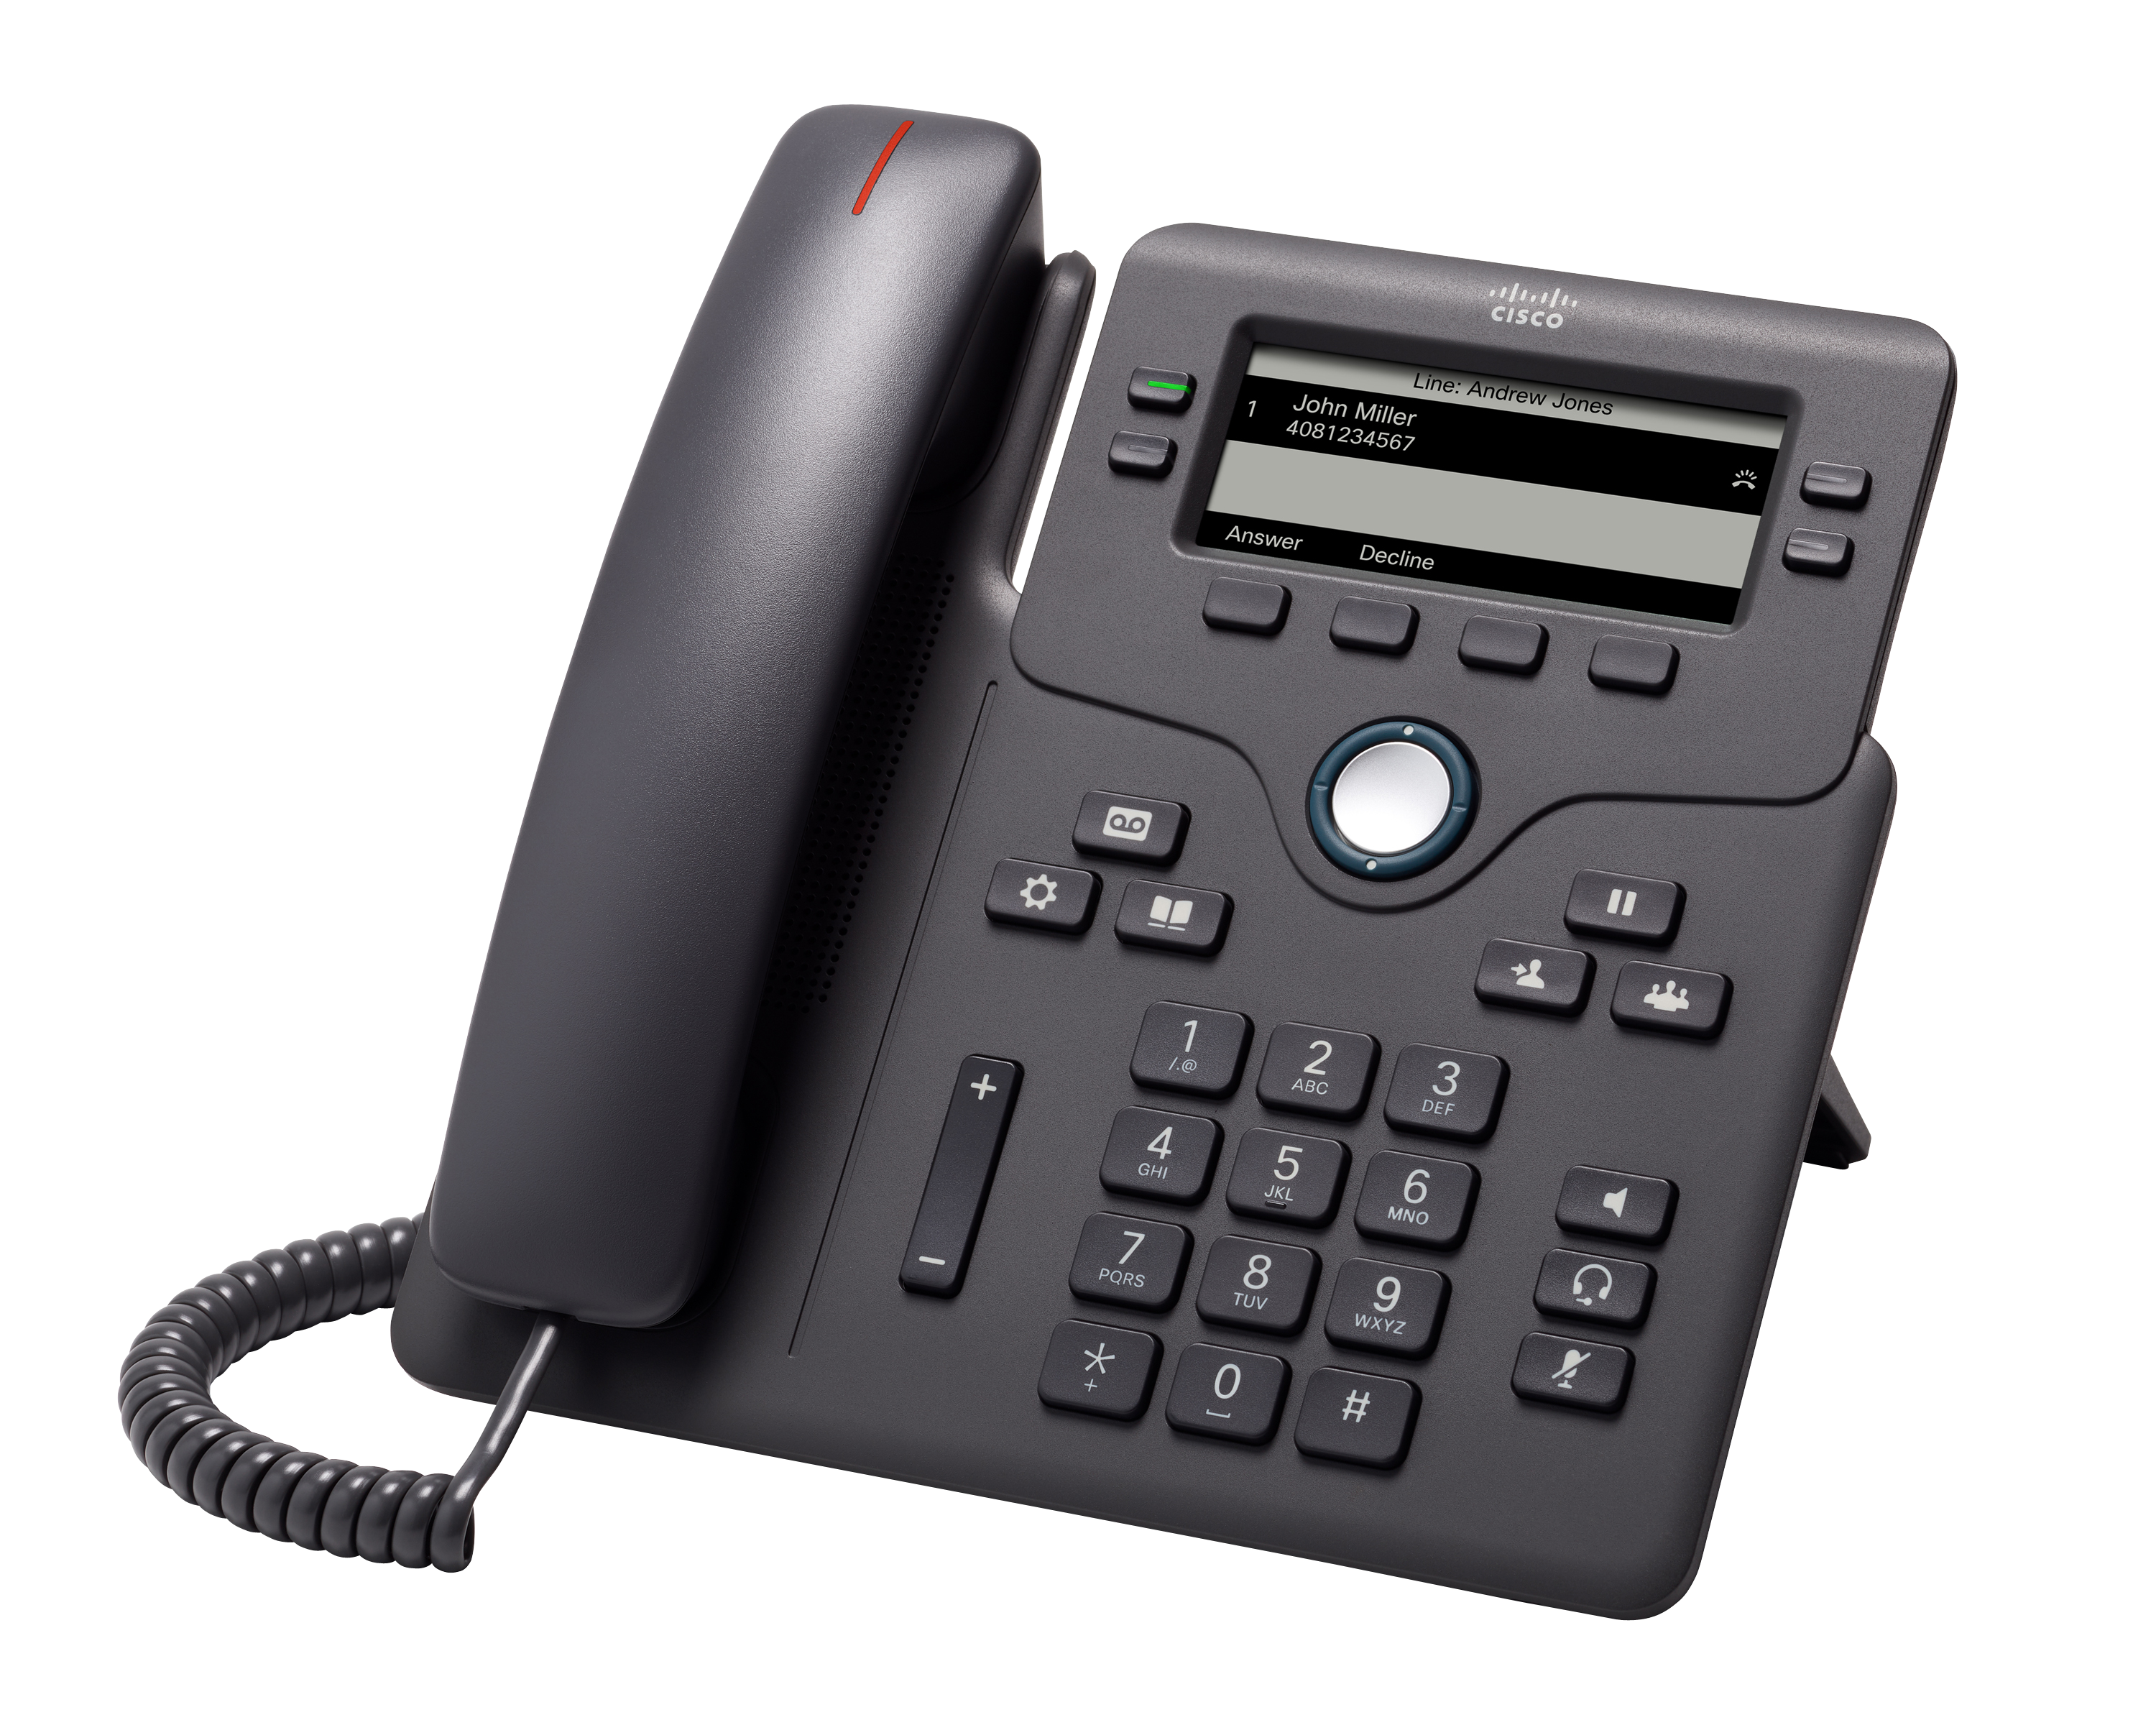
Cisco 6851 looking sharp.
The Cisco 6851 is one of two new Cisco phones offered by UBIK. Tested and approved by UBIK technicians, these phones are modern, safe and reliable at a reasonable price.
Introduction to phone lines and buttons
The full user guide is available here.

| N˚ | Feature | Description |
| 1 | Handset and Handset light strip | Indicates whether you have an incoming call (flashing red) or a new voice message (steady red). |
| 2 | Programmable feature buttons and line buttons |
|
| 3 | Softkey buttons |
|
| 4 | Navigation cluster |
Navigation cluster and Select |
| 5 | Hold/Resume, Conference, and Transfer |
Hold/Resume Conference Transfer |
| 6 | Speakerphone, Mute, and Headset |
Speakerphone Mute Headset |
| 7 | Contacts, Applications, and Messages |
Contacts Applications Messages |
| 8 | Volume button |
|
Phone maintenance
IP phones are electronic devices that should not be exposed to excessive heat, sunlight, cold, or water. To clean your phone, wipe with a damp paper towel. Do not spray or pour cleaning fluid directly on the phone.
Installing your phone
Before you get started
Before installing and connecting your phone, contact your system administrator to confirm that the phone can be installed on your network, read the safety notices and make sure you have all the phone parts and documentation.
Phone connections
Phone connections are shown below.
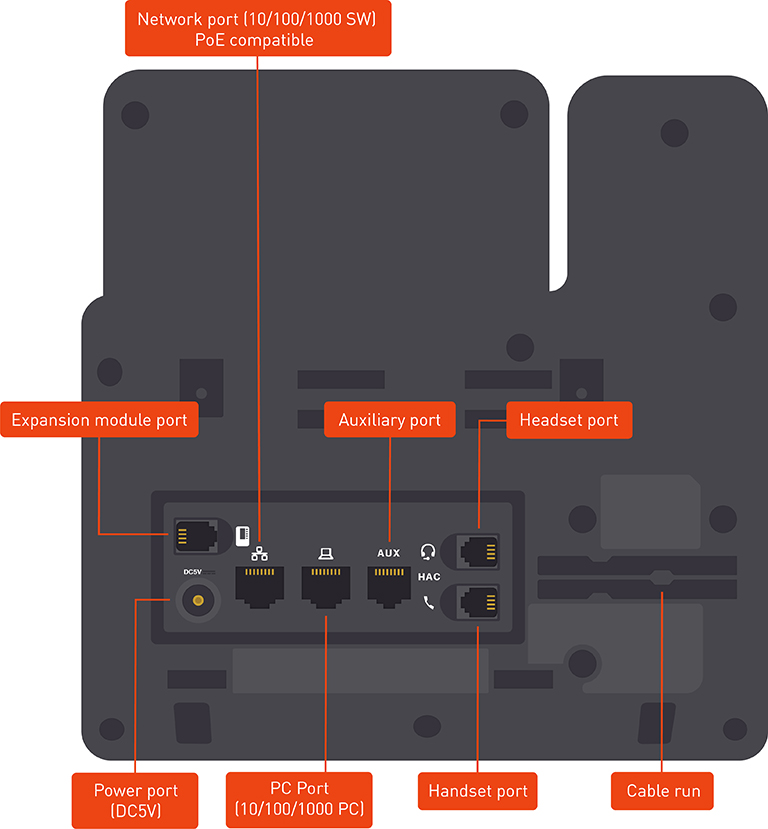
Cisco 6851 connections.
Connecting the handset
Procedure
1. Turn the phone body over to expose the ports on the back of the device. CAUTION: Do not insert a telephone line cord into the auxiliary (AUX) port.
2. Insert the long end of the phone cord into the handset port on the phone body (marked with a phone symbol).
3. Route the telephone cord through the cord run.
4. Insert the other end of the phone cord into the port at the bottom of the handset (not shown).
Connecting the power
If you are using an external power source, insert one end of the power cord into a wall outlet and the other end of the cord in the phone’s power port.
Connecting your phone to the network
Procedure
1. Insert one end of the Ethernet cable into the network port on the RJ-45 phone port (marked “SW”)
2. Insert the other end of the Ethernet cable into the appropriate device on the network, such as a network switch or wall outlet.
Connecting a PC to your phone (optional)
Procedure
1. To provide network access to a PC, connect one end of an Ethernet cable (not provided) to the PC port on the back of the phone body.
2. Connect the other end of the Ethernet cable to the RJ-45 port on your PC.
Phone startup
After receiving power and network connectivity, the phone executes a boot-up sequence.


